domenica 7 aprile 2013

How to use sessions on Google App Engine with Python and gae-sessions?

Google App Engine with Python does not provide built in session capabilities. This step by step walkthrough sets up a Google App Engine app using the lightweight gae-sessions utility.

1. Download gae-sessions

Download the gae-sessions code from https://github.com/dound/gae-sessions/

2. Create your app directory

Create a directory for your application. I’ll be using gaesessiontest/

3. Copy gaesessions to your app

From the gae-sessions download file, copy the gaesessions/ directory to your app directory.

4. Create your app.yaml file

Within your app directory create an app.yaml file with the contents:
application: gaesessiontest
version: 1
runtime: python
api_version: 1
 
handlers:
- url: /.*
  script: main.py

5. Create your appengine_config.py file

Within your app directory create an appengine_config.py file with the contents:
from gaesessions import SessionMiddleware
def webapp_add_wsgi_middleware(app):
    app = SessionMiddleware(app, cookie_key="You must change this")
    return app

6. Change the cookie_key

Change the cookie_key value to a secret combination of characters.

7. Create your main.py file

Within your app directory create a main.py file with the contents:
import os
 
from google.appengine.ext import webapp
from google.appengine.ext.webapp.util import run_wsgi_app
from google.appengine.ext.webapp import template
 
from gaesessions import get_current_session
 
class MainPage(webapp.RequestHandler):
    def get(self):
 
        # Get the current session        
        session = get_current_session()
 
        # Get the value of the counter,
        # defaulting to 0 if not present
        counter = session.get('counter', 0)
 
        # Increment the counter
        session['counter'] =  counter + 1 
 
        context = {
             "counter": counter 
        }
 
        path = os.path.join(os.path.dirname(__file__), 'index.html')
        self.response.out.write(template.render(path, context))
 
application = webapp.WSGIApplication(
                                     [('/', MainPage)],
                                     debug=True)
 
def main():
    run_wsgi_app(application)
 
if __name__ == "__main__":
    main()

8. Create your index.html file

Within your app directory create an index.html file with the contents:

<html lang="en">
<head>
<title>GAE Sessions</title>
</head>
<body>
Counter = {{ counter}}
</body>
</html>

9. Run your application

My GAE installation is located in /opt/google_appengine/ so I start the application with the command:
/opt/google_appengine/dev_appserver.py gaesessiontest

10. View your app

Open your browser and go to http://localhost:8080/. You should see a counter that increments each time you refresh the page.
This entry was posted in Google App Engine and tagged , , , , . Bookmark the permalink. Both comments and trackbacks are currently closed.

Another 10 Interesting JavaScript Features

I previously posted about 10 Interesting JavaScript Features. Here’s ten more JavaScript features that I’ve recently found interesting.

1. Dynamically call object methods

Javascript objects can contain functions as object members. Object members can be referenced using square bracket [] notation. Combining these ideas together we can dynamically call object methods:

var foo = {
 one: function() { console.log("one") },
 two: function() { console.log("two") }
};
 
var ok = true;
var result = foo[ok ? "one" : "two"]();
 
console.log( result ); // Prints "one"

2. Multi line strings

You can create multi-line strings in JavaScript by terminating lines that should be continued with a backslash:

var s = "Goodbye \
cruel \
world";
 
console.log( s === "Goodbye cruel world" ); // true

3. Recursion in anonymous functions

JavaScript allows functions to be created that have no names. These are called anonymous functions. A recursive function is one that calls itself, but how does a function call itself if it has no name?
First let’s consider a small program that applies a factorial function to numbers in an array.

// Our recursive factorial function
var factorial = function(n) {
    return n<=1 ? 1 : n * factorial(n-1);
};
 
// Function that applies a function to each element of the array
var applyTo = function(array,fn) {
 var i=0, len=0;
 for (i=0, len=array.length; i<len; i++) {
  array[i] = fn( array[i] );
 }
 return array;
};
 
// Test our function
var result = applyTo( [2,4,6], factorial );
 
console.log( result ); // Prints [2, 24, 720]
 
Rather that defining the factorial function separately, we can define it inline as a parameter to the applyTo() function call.

var result = applyTo([2,4,6], 
                     function(n) {
                         return n<=1 ? 1 : n * ???WhatGoesHere???(n-1);
                     }
                 );
 
Previously, JavaScript allowed us to replace the ???WhatGoesHere??? part with arguments.callee, which was a reference to the current function.

var result = applyTo([2,4,6], 
                     function(n) {
                         return n<=1 ? 1 : n * arguments.callee(n-1);
                     }
                 );
 
This method still works in modern browsers but has been deprecated, so remember what it means but don’t use it.
The new method allows us to name our inline functions.

var result = applyTo([2,4,6], 
                     function fact(n) {
                         return n<=1 ? 1 : n * fact(n-1);
                     }
                 );

4. Short cuts with ‘or’ and ‘and’ operators

When you or together several variables in a statement, JavaScript will return first ‘truthy’ value it finds (see previous post about truthy values). This is useful when you want to use a default value if an existing variable is undefined.

// Create an empty person object with no properties
var person = {};
 
// person.firstName is undefined, so it returns 'unknown'
var name = person.firstName || 'unknown';
 
// Prints 'unknown'
console.log(name);
 
In contrast, the and operator returns the last element, but only if all of the expressions are truthy, else it returns undefined.

var o = {};
o.x = 1;
o.y = 2;
o.z = 3;
 
var n = o.x && o.y && o.z;
 
// Prints 3
console.log(n);

5. A note about ‘undefined’

It turns out that undefined is not a JavaScript keyword, instead undefined is a global variable, which in browsers is defined as window.undefined.
It is not uncommon to see code that tests if a variable is undefined like this:

if (someObject.x === undefined) {
    // do something
}
 
Which is the same as writing

if (someObject.x === window.undefined) {
    // do something
}
 
If by some chance your window.undefined variable is modified then checks for undefined like this will fail. No conscientious developer would ever do this intentionally, but it may happen by accident causing hard to find bugs, like this:

var o = {};
window[o.name] = 'unknown'; // BLAM!, window.undefined is now a string
 
A better way to test for undefined is to use the typeof operator. Typeof an undefined variable will always return the string ‘undefined’.

// Good way to test for undefined
if (typeof someObject.x === 'undefined') {
    // do something
}

6. Return statement

The return statement needs it’s value to be on the same line as the return keyword. This may cause problem depending on your coding style. For example

// This is ok
return x;
 
// This returns undefined
return
    x;
 
// This is ok
return {
    result:'success'
}
 
// This returns undefined
return
{
    result:'success'
}
 
This behaviour is due to JavaScript’s automatic semicolon insertion.

7. Length of a function

JavaScript functions have a length property that provides a count of the number of arguments the function expects.

function foo(a,b,c) {
}
 
console.log( foo.length ); // Prints 3

8. The plus operator

The plus operator can be used to easily convert anything into a number by simply prefixing the value with “+”.

console.log( +"0xFF" );  // 255
console.log( +"010" );   // 10 
console.log( +null );    // 0
console.log( +true );    // 1
console.log( +false );   // 0
 
This is actually a just a nice shortcut for using the Number() function.

9. Object property names can be any string

JavaScript object members can have any string as their name.

var o = {
    "What the!": 'a',
    "Hash": 'b',
    "*****": 'c'
};
 
for (var key in o) {
    console.log( key );
}
Which prints:
What the!
Hash
*****

10. The ‘debugger’ statement

In the past we were limited to using alert() statements to debug our JavaScript. After that we were rescued with the much more sane console.log(). Things have come a long way and we now have solid line debugging available in modern browsers.
However, there is one addition to our debugging arsenal which I’ve found particularly invaluable when debugging JavaScript in Internet Explorer; the debugger statement.
When you add the debugger statement to your code the browser will stop execution and open the debugging environment ready for you to continue stepping through your code.
This is moderately useful on Chrome, Firefox and Safari but I have found essential for debugging IE.
Note that within IE, this statement only works in IE7 and above and you need to first start the debug mode.
OK, so that’s 10 features, but just one more thing to wrap up which is not really a JavaScript feature.

JavaScript Coding Coventions

If you’re not following a JavaScript coding convention then here are a couple to get you started:
This entry was posted in JavaScript and tagged . Bookmark the permalink. Post a comment or leave a trackback: Trackback URL.

Should you use semicolons in JavaScript?

There has been a quite a bit of chatter recently on whether or not you should use semicolons in your JavaScript code.

JavaScript provides a feature called Automatic Semicolon Insertion (ASI). For the most part there are rarely problems in omitting semicolons, but there are a few cases where semicolons are required to prevent syntax errors or resolve code ambiguities.


A site that triggered a lot of chatter was aresemicolonsnecessaryinjavascript.com which boldly states ‘NO’. The author is really trying to explain we should not just include semicolons everywhere due a fear that our code might break in some environments or parsers (such as JavaScript minifiers). Others are also continuing the same point that we should better understand why semicolons in JavaScript are optional.

Douglas Crockford, a leading expert in JavaScript recommends using semicolons at the end of every simple statement and his ubiqitious JavaScript code quality tool, JSLint, by default expects semicolons to be inserted. A poll on Stack Overflow strongly recommends using semicolons everywhere.

Lastly, I found Armin Ronacher’s post on dealing with JavaScript’s automatic semicolon insertion to be most useful. In particular his summary where he writes:
Are Semicolons Necessary in Javascript? Despite popular belief the answer is "sometimes" and not "no". But to save yourself time and troubles, just place them all the time. Not only will it save yourself some headaches, your code will also look more consistent. Because there will be situations where a semicolon becomes necessary to resolve ambiguities.
So what will I be doing? My vote goes to following Douglas Crockford’s JavaScript coding guidelines for now and I’ll be happily including semicolons in my code.

If you are interested, there are also a couple of discussions on Reddit regarding these couple of posts; Dealing with JavaScript’s automatic semicolon insertion and Are semicolons necessary in JavaScript?.

This entry was posted in JavaScript and tagged , , , . Bookmark the permalink. Both comments and trackbacks are currently closed.

Creating namespaces in JavaScript

In the past it was very common to see global variables in snippets of JavaScript code across the web, such as:

name = "Spock";
function greeting() {
 return "Hello " + name;
}
 
A better approach is to place all of your code within a namespace; an object that contains all of your code and helps to prevent name clashes with JavaScript code written by others.

The simplest method of creating a namespace is to use an object literal.

var foo = {};
foo.name = "Spock";
foo.greeting = function() {
 return "Hello " + foo.name;
}
 
This can also be specified using a different syntax.

var foo = {
 
 name: "Spock",
 
 greeting: function() {
  return "Hello " + foo.name;
 }
 
};
 
This approach is better that having outright global variables, but it exposes everything within the namespace as global. In other words both foo.name and foo.greeting are available everywhere.

Another problem with this approach is that greeting needs to refer to ‘foo.name’ rather than just ‘name’.

Another method of creating a namespace is through the use of a self executing function.

var foo = (function(){
 
 // Create a private variable
 var name = "Spock";
 
 // Create a private function
 var greeting = function() {
  return "Hello " + name;
 };
 
 // Return an object that exposes our greeting function publicly
 return {
  greeting: greeting
 };
 
})();
 
Here, when the function is executed it creates a private variable and a private inner function. The inner function can refer to the private variable directly. The main function then returns an object literal containing a reference to the greeting private function – this then exposes the greeting function as a public function so we can call it via the foo namespace.

console.log(foo.greeting() === "Hello Spock"); // true
 
This post was inspired by a good post from David B. Calhoun about spotting outdated JavaScript.

Preventing Hotlinking with Nginx and NodeJS

If you are running a NodeJS site via Nginx then you may be using proxy_pass to route requests from Nginx to Node.

If you’d like to also prevent hot linking then you might like to first have a read of Marcel Eichner’s post on preventing hot linking which this post is based on.

Then you can use a slightly modified version of that code which includes the proxy_pass directive in both of the location sections.

server {
    server_name yourdomain.com www.yourdomain.com;
    location ~* (\.jpg|\.png|\.gif)$ {
        valid_referers none blocked yourdomain.com www.yourdomain.com ~\.google\. ~\.yahoo\. ~\.bing\. ~\.facebook\. ~\.fbcdn\.;
        if ($invalid_referer) {
            return 403;
        }
        proxy_pass http://127.0.0.1:8123;
    }
    location / {
        proxy_pass http://127.0.0.1:8123;
    }
}
 
Some notes about this code:
In the valid_referers line, ‘blocked’ allows Referers that have been blocked by a firewall, ‘none’ allows requests with no Referer.

This is then followed by a list of domains and domain patterns that are also allowed. Google, Bing, etc are allowed for their image bots to access your site.

Decoding jQuery – domManip: DOM Manipulation

In the Decoding jQuery series, we will break down every single method in jQuery, to study the beauty of the framework, as an appreciation to the collective/creative geniuses behind it.


Inside manipulation.js within the jQuery source, there is an interesting internal method named

domManip, this is mainly used for methods like: .append(), .prepend(), .before() and .after().
domManip: function( args, table, callback ) {
  //...
}
 
Using fragment
In domManip, jQuery first checks if we are dealing with fragment node. In DOM, there are 12 different node types, and the one jQuery is checking is type 11 (Node.DOCUMENT_FRAGMENT_NODE == 11).
If we’re in a fragment, just use it, otherwise, building a new one using jQuery.buildFragment.
 
if ( jQuery.support.parentNode && parent && parent.nodeType === 11 && parent.childNodes.length === this.length ) {
    results = { fragment: parent };
} else {
    results = jQuery.buildFragment( args, this, scripts );
}
 
jQuery.buildFragment
Let’s take out jQuery.buildFragment and see what it does. The method comes with excellent explanation that talks about what each block of code does:

1. nodes may contain either an explicit document object, a jQuery collection or context object. The following checks if nodes[0] contains a valid object to assign to doc

if ( nodes && nodes[0] ) {
  doc = nodes[0].ownerDocument || nodes[0];
}
 
2. Ensure that an attr object doesn’t incorrectly stand in as a document object, Chrome and Firefox seem to allow this to occur and will throw exception
if ( !doc.createDocumentFragment ) {
  doc = document;
}
With the above check, the script will then fragment
if ( !fragment ) {
  fragment = doc.createDocumentFragment();
  jQuery.clean( args, doc, fragment, scripts );
}
 
3. To check if an element is cacheable. The method only caches “small” (1/2 KB) HTML strings that are associated with the main document. Cloning options loses the selected state, so it doesn’t cache them. IE 6 doesn’t like it when you put object or embed elements in a fragment. Also, WebKit does not clone ‘checked’ attributes on cloneNode, so it doesn’t cache them either. Lastly, IE6, 7, 8 will not correctly reuse cached fragments that were created from unknown elements.

if ( args.length === 1 && typeof first === "string" && first.length < 512 && doc === document &&
    first.charAt(0) === "<" && !rnocache.test( first ) &&
    (jQuery.support.checkClone || !rchecked.test( first )) &&
    (jQuery.support.html5Clone || !rnoshimcache.test( first )) ) {
 
    cacheable = true;
 
    cacheresults = jQuery.fragments[ first ];
    if ( cacheresults && cacheresults !== 1 ) {
      fragment = cacheresults;
    }
  }
 
The following script does the caching once it’s determined cacheable:

if ( cacheable ) {
  jQuery.fragments[ first ] = cacheresults ? fragment : 1;
}
 
Appending script
I first discovered this while inserting a script tag using jQuery and inspect the element without seeing this. This is because within the domManip, there is a check for script elements.

if ( scripts.length ) {
  jQuery.each( scripts, function( i, elem ) {
    if ( elem.src ) {
      jQuery.ajax({
        type: "GET",
        global: false,
        url: elem.src,
        async: false,
        dataType: "script"
      });
    } else {
      jQuery.globalEval( ( elem.text || elem.textContent || elem.innerHTML || "" ).replace( rcleanScript, "/*$0*/" ) );
    }
 
    if ( elem.parentNode ) {
      elem.parentNode.removeChild( elem );
    }
  });
}
 
This check does 4 things here:
1. first it detects and loop through all the script elements
2. if the script element has a src attribute, then jQuery uses jQuery ajax to load the script
3. if the script is embedded, jQuery uses jQuery.globalEval to evaluate the script
4. it removed the child from the parent element

Decoding jQuery – Callbacks Object

In the Decoding jQuery series, we will break down every single method in jQuery, to study the beauty of the framework, as an appreciation to the collective/creative geniuses behind it.


The jQuery.Callbacks() function, introduced in version 1.7, returns a multi-purpose object that provides a powerful way to manage callback lists. It supports adding, removing, firing, and disabling callbacks. (jQuery API Doc)
It provides many Supported Flags. It is structured as a list of space-separated strings that change how the callback list behaves (eg. $.Callbacks( ‘unique stopOnFalse’ )).
Callbacks Object can also be used to do pub/sub and it is also used to make jQuery.Deferred().
1. Structure of jQuery.Callbacks()
Below is how the structure of jQuery.Callbacks() function looks like in jQuery source(callbacks.js).

jQuery.Callbacks = function( flags ) {
 
  // Convert flags from String-formatted to Object-formatted
  // (we check in cache first)
  flags = flags ? ( flagsCache[ flags ] || createFlags( flags ) ) : {};
 
  var // Actual callback list
    list = [],
    // Stack of fire calls for repeatable lists
    stack = [],
    ...
    // Add one or several callbacks to the list
    add = function( args ) {
      //...
    },
    // Fire callbacks
    fire = function( context, args ) {
      //...
    },
    self = {
      //...
    };
 
  return self;
};
 
add function – adds a list of callbacks to the variable list array.
fire function – loops through the items in the list and fire them one by one.
self object – is the actual Callbacks object returned at the end of the function.
The most important methods in the self object are:
add() adds a callback or a collection of callbacks to the list, this is the one we use to build subscribe in pub/sub function
fireWith() method actually calls all callbacks with the given context and arguments
fire() method inside the self object executes fireWith with the object as the context, this is the one we use to build publish in pub/sub function
There are also many other essential and useful methods in the self object, they are:
has(): a boolean check to find out if a callback list contains a specific callback
remove(): Remove a callback from the list
empty(): a method for emptiying a callback list of all callbacks added so far
disable(): disables further calls being made to the callback list
lock(): lock the list in its current state

2. How to use Callbacks object
Suppose we have a Rails application, assume we have a function displayAlert and msgStatus like the ones below.

var displayAlert = function( msg ) {
      console.log( msg );
    },
    msgStatus = function ( msg ) {
      fn1(msg + '...feed is read!');
      return false;
    },
    callbacks = $.Callbacks();
callbacks.add( displayAlert );
callbacks.fire( 'new message 1' ); // outputs: new message 1
callbacks.add( msgStatus );
callbacks.fire( 'new message 2' ); // outputs: new message 2, new message 2 is read!
 
After creating a callbacks = $.Callbacks();, we can use add to add displayAlert to the callbacks variable as a list item, and later add postFeed as a new item. By using fire, the callbacks object is fired with the function/functions executed.
As explained above, fire is actually fireWith with the object itself as the context, you can also define/specify a context and arguments for callbacks being bound and fired.

var fn = function (argA, argB) {
  //..
}
callbacks.add( fn );
callbacks.fireWith( window, ['foo', 'bar']);
// outputs: foo, bar
 
Addy Osmani provided example code for some of these methods and some of the flags arguments in his Demystifying jQuery 1.7′s $.Callbacks

3. How does a pub/sub function work
Below is an example of building a jQuery.Actions for publish and subscribe when microposts are received/sent, as well as sent status.

var displayAlert = function(msg) {
  //...
}
 
var msgStatus = function(msg) {
  //...
}
var actionItems = {};
 
jQuery.Actions = function( id ) {
  var callbacks,
      method,
      action = id && actionItems[ id ];
  if ( !action ) {
    callbacks = jQuery.Callbacks();
    action = {
      publish: callbacks.fire,
      subscribe: callbacks.add,
      unsubscribe: callbacks.remove
    };
    if ( id ) {
      actionItems[ id ] = action;
    }
  }
  return action;
};
 
// Subscribers
$.Actions('micropostArrived').subscribe(displayAlert);
$.Actions('micropostSent').subscribe(displayAlert);
$.Actions('micropostSent').subscribe(msgStatus);
 
// Publisher
$.Actions('micropostArrived').publish('New Items arrived');
$.Actions('micropostSent').publish('Item posted');
 
In the above example, the publish and subscribe use fire and add for the pub/sub pattern, and remove for unsubscribe.
This is not the only way to use jQuery for pub/sub, Addy’s Four Ways To Do Pub/Sub With jQuery 1.7 and jQuery UI gist discussed more ways of doing it with jQuery and jQuery UI.

Alienware Joins the Ubuntu OEM Family

Alienware (a Dell Inc. subsidiary) begins offering its first Ubuntu-powered PC targeted at gamers.
Image from alienware.com
The Alienware x51 series is a standalone PC tower which you would attach to your own TV and peripherals and starts at $599 (ranging up to $1049, with “build yours” options).

Ubuntu on Alienware

Regarding Ubuntu, Alienware describes it’s “simple and stylish” nature, and highlights that it’s “fast and secure” and offers “free applications and storage”, not to mention explaining (to newcomers, presumably) the plethora of Ubuntu default applications.
Alienware also plugs Steam for Linux as the gaming platform on this PC, noting the rapidly expanding Linux game library that Steam provides.

Video Hardware

Arguably the most important element for gaming is the graphics card and the X51 systems offer NVIDIA hardware. Of course, under Ubuntu you would have NVIDIA’s supported drivers out-of-the-box, so you would be able to game right away. Having said that, it probably would be ideal to keep tabs on updates for the drivers regularly.

More info

You can check out the Alienware website for more info on the x51 series, such as the range of hardware specifications and availability.

Intel Release Graphical Installer for Their Linux Drivers

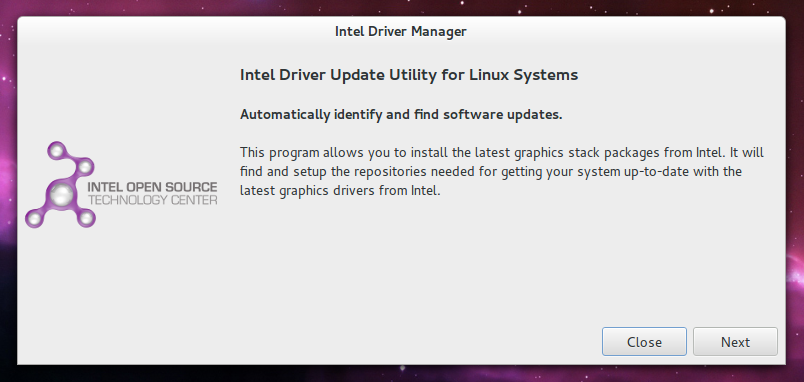
The Intel Linux Graphics Installer provides a friendly way for downloading the latest Intel Linux graphics software stack.

Early in March, Intel –specifically the Intel Open Source Technology Centre– released a graphical installer providing Linux users with a friendly way for downloading the latest Intel-related open source Linux graphics components –for the more technical this includes:
  • the Intel core kernel driver
  • Mesa 3D rendering library, responsible for 3D rendering, OpenGL compatibility, GLES, etc.
  • the 2D renderer for the X Window stack (xf86-video-intel), also known as DDX.
  • libdrm –the “Direct Rendering Manager” library, for communication between user applications and the kernel
  • the Cairo graphics library, for 2D rendering and acceleration
  • vaapi-driver-intel –the APIs for hardware-accelerated video rendering, processing and output
  • initial support for Wayland

Getting the Latest and Greatest Intel Linux Drivers

Intel Linux Graphics Installer automatically detects your hardware and system specifics and adds a software repository to your sources for keeping you up-to-date. The installer also performs a check to see if your system is running the latest drivers and, if not, it runs a system upgrade.

intelgraphicsdriverinstaller

However, the installer doesn’t automatically add the repository authentication key to your system but it can manually added by opening a terminal, and executing:

wget --no-check-certificate https://download.01.org/gfx/RPM-GPG-KEY-ilg -O - | \
sudo apt-key add -

Download & Install for Ubuntu

Supporting both 32 and 64 bit systems, the Intel Linux Graphics Installer is available for download for Ubuntu 12.04 and 12.10 (as well as Fedora 17, 18) via their website:

Spotify Rival Rdio Gets New Ubuntu App

Music streaming service, and major Spotify rival, Rdio recently upped its ‘free’ offerings for international users.
 
For the cost of an e-mail address users in a multitude of countries, including the UK, Germany and France, can now get 6 months of free on-demand access to Rdio’s library of music.
With over 18 million tracks on offer – albeit 3 million less than Spotify – most major artists, labels and songs are available.

Alongside the 6 month ‘trial period’ free users are also subject to a monthly playback limit. There’s no set-rate for how many songs this is but there is a green ‘tracks remaining’ meter at the top of the Rdio page to let you know how much free music you have remaining for the present month.

meter

Track Remaining Meter on Rdio

For contrast, Spotify offers six months of unlimited but ad-supported playback for free. After this free users are subject to a 2.5 hour listening limit per week thereafter.
Rdio’s hope is, of course, that by offering a relatively lengthy free trial with few limits, users will be such fans of the service they’ll be chomping at the bit to sign up to one of the two premium accounts on offer when their free trial ends.
With Rdio, $4.99/£4.99 per month gets you unlimited web/desktop app playback, while £9.99/$9.99 a month extends this access to smart-phones, tablets and media devices.

Availability

Rdio is currently available to users in the USA, New Zealand, Australia and much of western Europe, including Germany, France, Sweden and the UK.
A roll-out to Japan on the cards for later this month.

Accessing Rdio on Ubuntu

So that’s what Rdio offers for free and where it offers it – but how well supported is it in Ubuntu?
Like Spotify, Rdio provides desktop applications for various platforms but, unlike Spotify, this doesn’t include Linux. Worse still, Rdio say that “wider Linux desktop support isn’t currently on the roadmap.”

The good news is that Rdio‘s primary playback spot is via its gorgeous web player. This can be accessed from any web-browser that supports Flash, and on any platform. Just log-in and away you go.

Unity Web App

unity-rdio

A Unity Web App is Already Available

Further still, Rdio is one of the few third-party websites to support Unity’s (much maligned) Web Apps feature. Visit the web-site in Firefox or Chromium and you’ll be prompted to enable integration.

Whilst this approach integrates the web plater with Ubuntu’s Sound Menu it doesn’t support track change notifications, quick-list controls, or media key support.
In fact, here at least, it also lacks an icon…

The good news is that, thanks to a third party developer, we can now go one better on Ubuntu…

New Rdio Desktop App for Ubuntu

Rdio‘ by developer Scott Ringwelski is an unofficial Rdio app for Ubuntu.
It runs the Rdio website interface in a dedicated windowed ‘wrapper’ on the desktop, hooking into the Ubuntu Sound Menu, notification system and Unity Quicklists.

rdio-app

Rdio Desktop App for Ubuntu – Unity Support Baked In

These minor additions turn what is, essentially, a ‘web-app’ into something that feels more native than running the Rdio site in a browser tab.

Simple things, like being able to hit the ‘Next’ or ‘Pause’ keys to control playback really aid this.
If you’ve been looking for a reason to give Rdio a go – now seems the perfect time.

Features

  • Ubuntu Sound Menu Integration
  • Ubuntu Notification System Support
  • Unity Launcher Quicklist
  • Media Key Support

Drawbacks

  • Clicking ‘x’ will exit the app
  • Adobe Flash is required for playback
  • Doesn’t support music download

Download Rdio for Ubuntu

Installing Rdio in Ubuntu 12.04, 12.10 & 12.10 is as easy as adding the following PPA:
sudo add-apt-repository ppa:sgringwe/rdio
sudo apt-get update && sudo apt-get install rdio
Or download and install one of the following .deb installers:


For more information on Rdio for Ubuntu head over to the project’s Github page:

Latest Release of GNOME Web Browser Available for Ubuntu 13.04 Users

web-epiphany-38

Following on from its release last week, GNOME’s default web-browser is now available for users of Ubuntu 13.04 to install.
The aptly-titled Web, is a lightweight webkit browser built using GNOME technologies and designed specifically for the GNOME desktop.
Ubuntu GNOME 13.04 users can install the release from the GNOME PPAs, both of which also upgrade the stock GNOME 3.6 desktop to GNOME 3.8.

Why Web?

Despite being the default web-browser in GNOME few GNOME-using distributions actually ship with it by default. Ubuntu GNOME, Fedora and OpenSuSE instead provide Firefox to their users. That’s understandable: Firefox is a power-house of a name.
But just because Web is a less well known doesn’t mean that it’s less useful. In fact, it’s rather charming. The minimal gives less room to excessive options and more room to web-pages, and if you can live without add-ons, themes and extensions, you’ll find it can do just about anything other browsers can.
And that list of ‘can do’s’ grows a little longer in this latest release…

New in Web 3.8

But what’s new in Web 3.8 specifically? Quite a fair bit.
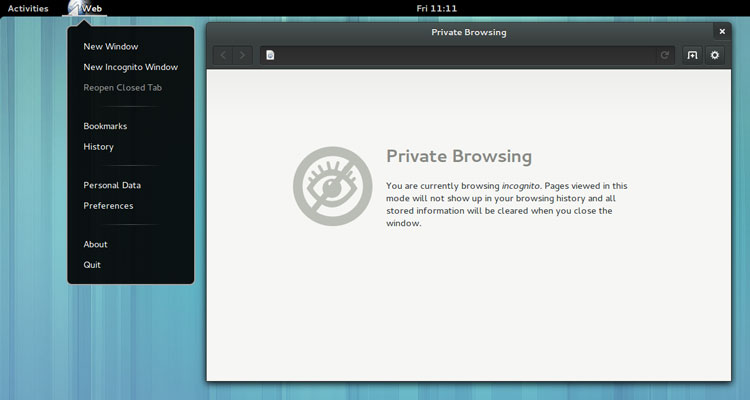
A private browsing mode has been added, letting you tip-toe around the web without leaving a trace.
To go ‘Incognito’ just click the Web app menu and select ‘New Incognito Window’.

private-and-reopen

Private Browsing in Web 3.8

Another user-experience tweak – and one many will be incredibly pleased to see arrive – is the arrival of a ‘New Tab’ button in the application toolbar. I sorely missed having this accessible in previous versions.

Adobe’s Flash plugin is now supported natively. Just install the Adobe Flash Plugin installer package from the Ubuntu Software Center and Web will do the rest.
Other changes in addition to those mentioned above:
  • ‘Page Search’ style now matches other GNOME apps
  • Improved HTML5 media controls 
  • ‘Undo Closed Tab’ action added to App Menu 

Install Web 3.8 in Ubuntu GNOME 13.04

In stock, freshly installed Ubuntu GNOME you can install the previous version of Web, version 3.6, straight from the Ubuntu Software Center.

But for this newer, more featured and more stable release you’ll need to add the following GNOME Team PPA. It’s important that you’re aware that adding this will also upgrade the rest of your desktop to GNOME 3.8.

First add the GNOME Team PPA using the Terminal:

sudo add-apt-repository ppa:gnome3-team/gnome3; sudo apt-get update
 
Now hit the button below to install Web 3.8 through the Ubuntu Software Center